Berkeley Campanile

Noisy Campanile (t=250)

Noisy Campanile (t=500)

Noisy Campanile (t=750)
This part of the project is meant for an exploration of (pre-trained) diffusion models.
A key part of diffusion is the forward process, which takes a clean image and adds noise to it. Here, we implement the forward process defiend by:
Here, we implement Gaussian blur filtering to tray to remove the noise:


It is apparent that the denoising process from previous part wasn't ideal. Now, we will use a pretrained UNet to denoise (or more specifically remove the noise to recover something very close to the original image). Below, are the one-step denoised image versus their noisy version.


We see that from the previous part the one-step denoising results are much better than those from Gaussian dneoise. However, we can still see a slight deviation from the actual image, especially as we add more noise. To improve, we can implement iterative denoising where, say, we start with noise \(x_{1000}\) at timestep \(T=1000\), and carry on until we get \(x_0\). To increase efficiency and reduce cost, we can actually skip a few steps. That is, we have a list of timesteps 'strided_timesteps', where 'strided_timesteps' corresponds to the noisiest image and 'strided_timesteps[-1]' will correspond to a clean image. Each element of the list thus corresponds to a decreasing timesteps:


Using the 'iterative_denoise' function is to generate images from scratch. We can do this by setting 'i_start=0' and passing in random noise. This effectively denoises pure noise and generate random images:


We can see from previous part that the generated images are not ideal in the sense they don't exactly look real. One way to mitigate this issue is to use Classifier-Free Guidance, where we compute both a conditional and an unconditional noise estimate. This is defined as:


In part 1.4, we take a real image, add noise to it, then denoise it. Here, we take the original test image, noise it a little, and force it back onto the image manifold without any conditioning. The expectation is that we are going to get a novel image that is similar to the original image. This follows the SDEdit algorithm.


This procedure works particularlyu well if we start with a nonrealistic image (e.g. painting, sketching, or some scribbles) and project it onto the natural image manifold:


With these foundations, we can train an unconditional UNet to denoise images.
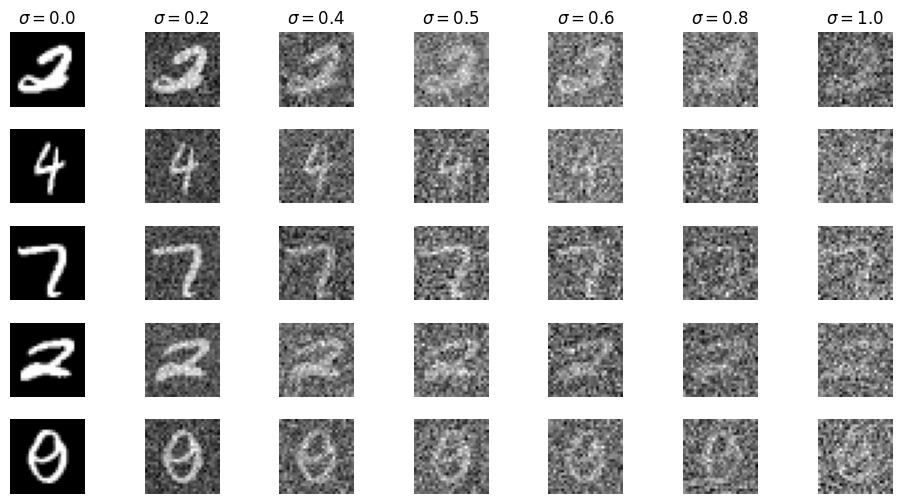
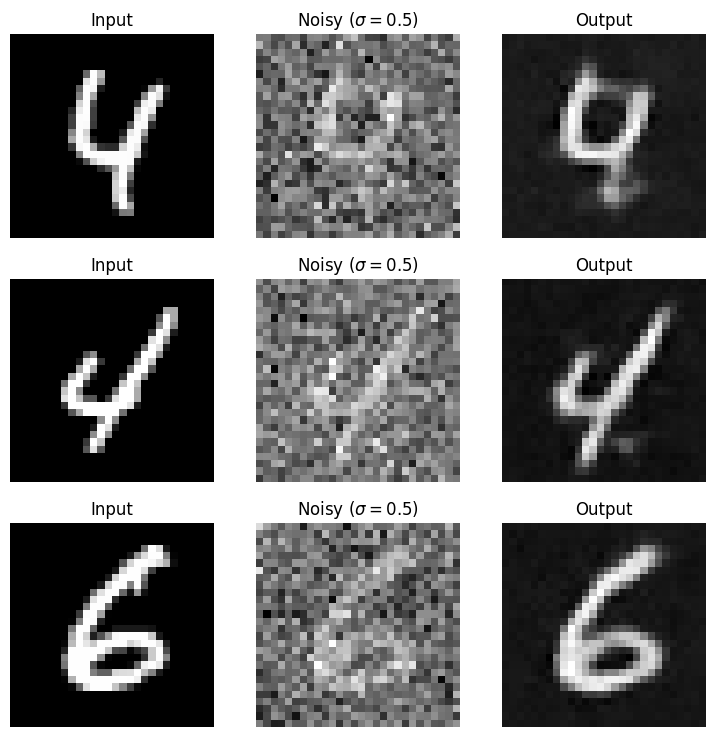
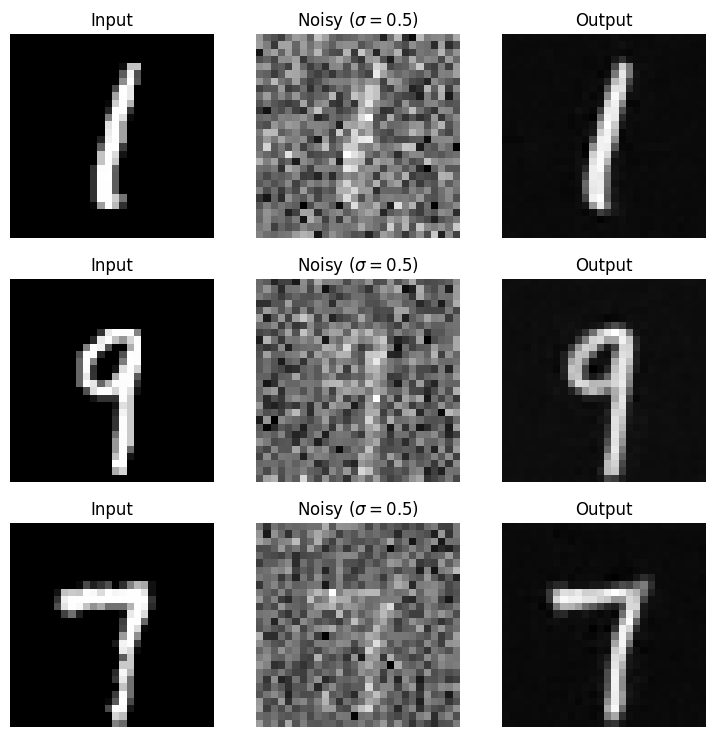
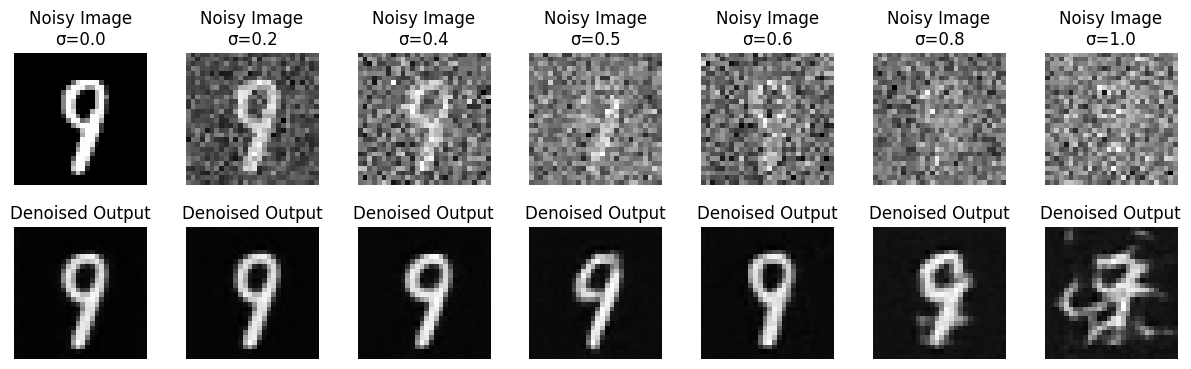
Using σ=0.5, we train the denoiser on the MNIST datset with batch size 256, 5 epochs, hidden dimension 128. For the Adam optimizer, we used a learning rate of 1e-4.
Visualizing a few example, we see that the results are reasonably well.
Since our denoiser was trained on σ=0.5, the model will likely not perform as well on different σ's, especially for those that are greater than the one we trained.
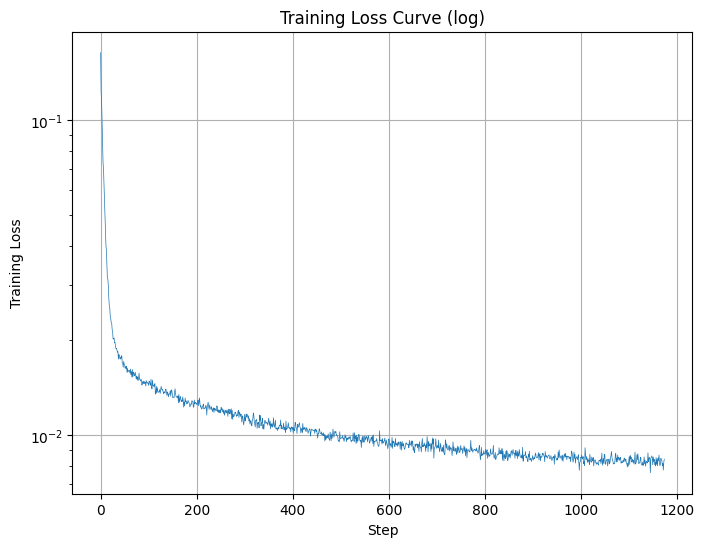
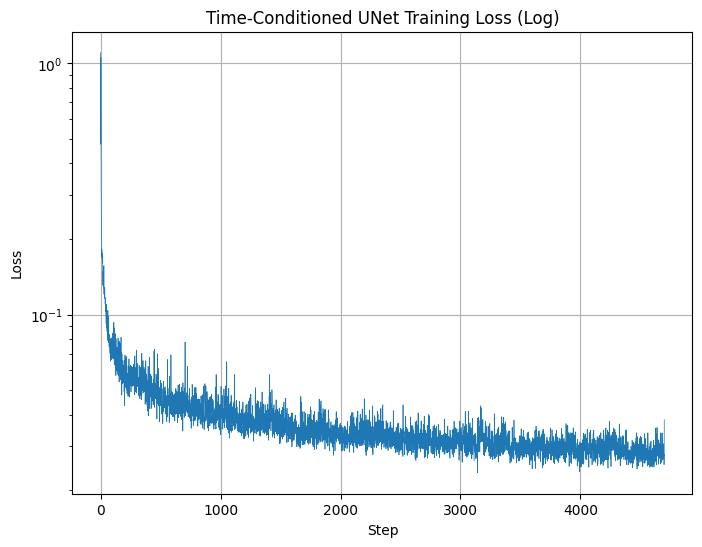
In this part, we're essentially trainig the UNet model as a Denoising Diffusion Probabilistic Model, where the goal is to iteratively predict noise added to images over a series of timesteps.
Here, we expand on our original unconditional UNet by injecting scalar t into our UNet model and condition it. To do so, we have to implement a new building block: FCBlock(...)
Following the given algorithm, we establish the training loop and arrive at the following results:
Additionally, we also implemented DDPM (Denoising Diffusion Probabilistic Model) to help visualizing some denoised samples.
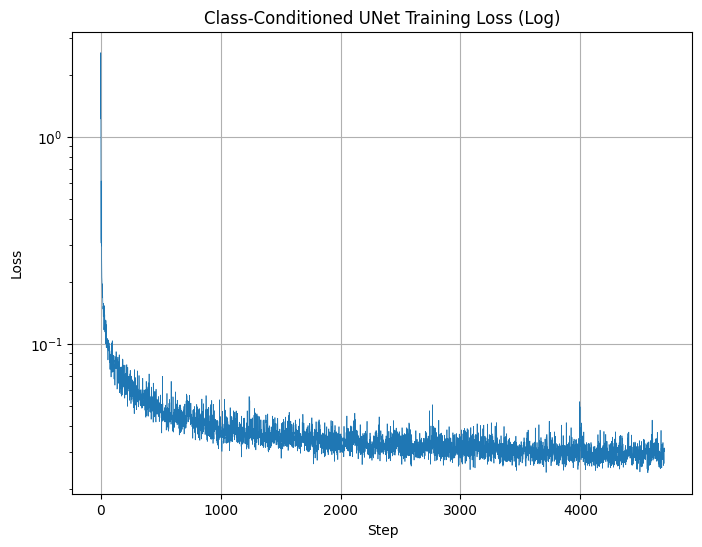
To generate better result and give us more control to our output, we can also optionally condition our UNet on the class of the digit 0-9. To do so, we need to add two more FCBlocks to our previous implementation. For the class conditioning vector, we encode into a one-hot vector for simplicity. We also set p_{uncond}=1 to include a 10% dropout, allowing the model to still operate in case when class is not being conditioned.
Applying similar technique as 2.3, we can visualize some of these samples: